How to Install Android N Developer Preview on Nexus Devices
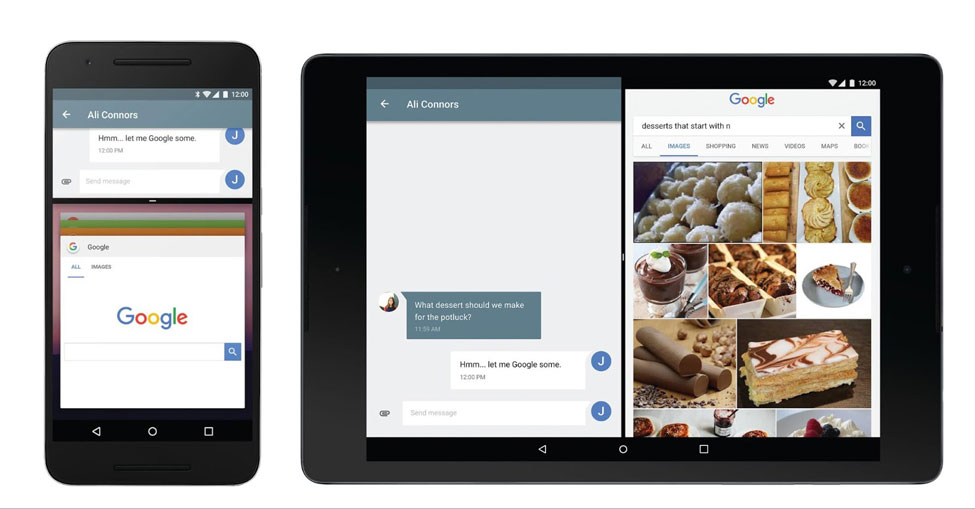
Google already announced the upcoming Android N OS version and now the tech giant surprised us with the Developer Preview for the same. According to the Google’s Developer blog, many new tools and features have been incorporated into the first preview of the Android N source code. It features Multi-window, Direct reply notifications, Bundled notifications, Bundled notifications, Efficiency, Improved Java 8 language support and more. Moreover, a new Android N SDK is also available to developers to try out new Applications for the same. Also check out latest Nexus 6P And Nexus 5X To MHC19I, MHC19J Firmware update.
The Android N Developer Preview for Nexus devices like Nexus 5X, Nexus 6, Nexus 6P, Nexus 9, Nexus 9 LTE, Nexus Player, Pixel C is now available and we will keep updating the files here as we get it. If you happen to possess a link for the first developer preview for a device not listed here, then kindly leave it in the comments and the Android community will thank you for it. So if you are looking forward to getting the latest AOSP source code running on your Android device, then grab the factory images from below and flash the it using the instructions listed. The workaround for Linux, Mac and Windows OS users have been listed below. Update: Android N Developer Preview 2 Factory Images are now available to download.
Download Android N Developer Preview
Here are the Android N Preview 1 Factory Images NPC56P
Android N Preview 2 Factory Images build NPC91K
- Nexus 5X
- Nexus 6
- Nexus 6P
- Nexus 9
- Nexus 9 LTE
- General Mobile 4G (Android One)
- Pixel C
- Nexus Player (Coming soon)
Android N OTA: Install Android N Developer Preview With OTA Update Easily
Method 1: How to Install Android N Developer Preview on Nexus Devices
This procedure will flash factory image on the Nexus device. It will perform a clean firmware installation and hence all your data and apps will be lost. So make sure you backup everything on your PC. Go through the prerequisites mentioned and then proceed with the instructions from below. There are 2 methods to flash the developer preview
Prerequisites
1. Verify your device for compatibility. The Developer Preview is compatible with the listed Nexus devices only.
2. Enable USB Debugging on your device. To do so, go to Settings>About Phone> Tap on the Build Number several times until you get a new Developer Options in theSettings. Open Developer Options and enable USB Debugging from there. Trust the connection by allowing it when you connect it to your PC for the first time.
3. Make sure you have latest device drivers setup on your PC for a better connection. Get it from the official page of your device manufacturer.
4. For ADB and Fastboot download the quick ADB and Fastboot Installer from here for Windows PC or get the easy installer tool for iOS, Linux, and Chrome OS. You may also like Universal ADB drivers, Naked ADB drivers.
Installation Instructions
Step 1: Download the Developer Preview image from above and transfer it to your PC.
Step 2: Make sure you have setup ADB and Fastboot on your PC. Also, accept Always allow from this computer when you plug in the device for the first time to enable USB Debugging. It’s better to use the quick ADB installer for Windows.
Step 3: Now keep your device plugged in and reboot your device into bootloader or Fastboot mode. To do so, you can issue the following code while connected to the PC. Make sure your device is turned on and connected to PC. Open command prompt or terminal and issue the command.
adb reboot-bootloader
Alternatively, try the button combinations while the phone is turned off- press and hold volume down and the power button simultaneously for a few seconds. When you see the bootloader screen, connect your device to the PC using a USB cable.(Choose fastboot if such an option is available)
Step 4: Now you may need to unlock the bootloader on your Nexus device before you flash the developer preview. It will wipe all the user data. Issue the following command for that.
fastboot oem unlock
For newer devices like Nexus 6P, the code has changed for the Android 6.0.1 Marshmallow firmware. To unlock bootloader, issue:
fastboot flashing unlock
Step 5: Once done, navigate to the location where you have placed the factory image file on PC and extract it to get all the files like system, bootloader, etc along with the flashall.bat file as shown. (The image is just for correspondence. So the Dev Preview files may not look like the image.)

Step 6: While the folder with the extracted factory image is open, run the flash-all.bat file on Windows PC and confirm the flashing process. Wait for the process to complete. If you use Linux or Mac OS, run then run the flash-all.sh file and follow the instructions. But first open the flash-all.sh file and verify if the files start with “./” prefix for Mac and “sudo” for Linux. If not then add a prefix to every file name.
Step 7: Once done, reboot the device into system either manually or using the command:
fastboot reboot
Once you see the new boot logo, that means the system has successfully been installed. First boot may take a while, so be patient. If necessary, you may need to unlock the bootloader on your Nexus device if the method fails.
Method 2: Install Android N Developer Preview on Nexus Devices
Alternatively, if you don’t find the flash-all.bat file or the flash-all.sh file, then you will need to flash each file manually by rebooting into bootloader or fastboot mode and issue the following commands through the terminal while the device is still connected. Check out the Method 1 before you proceed to know the proper setting and commands for the Windows, Mac and Linux users. To open the command prompt on Windows, install ADB quick installer and hold the shift key on the keyboard and right-click on the mouse and select Open cmd here. Open the cmd or terminal where you have extracted the package.
fastboot flash bootloader bootloader.img
fastboot reboot-bootloader
fastboot flash radio radio.img
fastboot reboot-bootloader
fastboot flash system system.img
fastboot flash userdata userdata.img
(Note: this command will wipe your device (including \sdcard), EVEN if your bootloader is already unlocked.)
fastboot flash boot boot.img
fastboot flash recovery recovery.img
fastboot erase cache
fastboot flash cache cache.img
Now the trick is to find all the files available in your firmware and flash them with the proper extension following the same pattern as above. The files or their names may change according to device or firmware. So verify it. Follow and like us on social platforms. If you come across any error, comment below. You may also like OTA for all Nexus devices.

