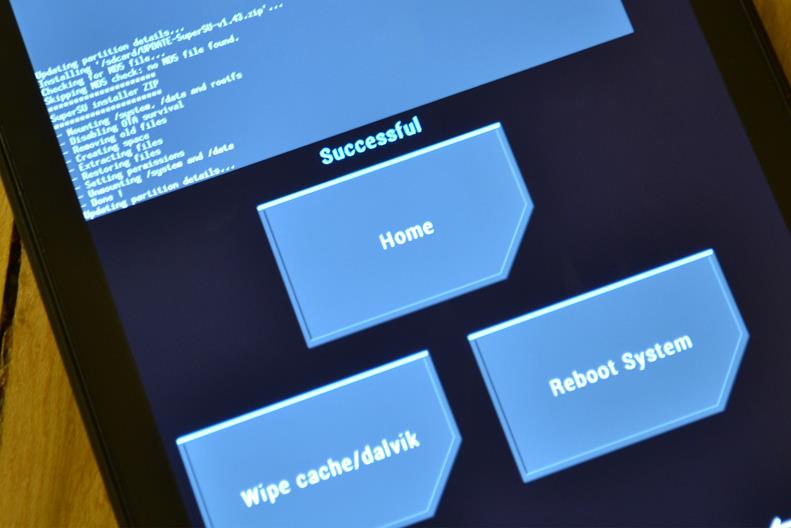
How To Install TWRP Recovery on Your Android Device

TWRP (Team Win Recovery Project) is a popular custom recovery image for Android devices that provides a touchscreen-enabled interface for advanced functionality beyond the stock recovery. Some key features of TWRP recovery include:
- Rooting Android devices using Magisk, SuperSU, or apatch.
- Backing up partitions in TAR or raw image format
- Restoring backups from internal storage, external SD storage or OTG devices
- Installing custom firmware and mods like custom ROMs, kernels, GApps, etc.
- Wiping and formatting partitions like system, data, cache, etc.
- Mounting partitions for file management
- Providing a terminal emulator and basic file manager
To install TWRP, you typically need an unlocked bootloader. The process involves flashing the TWRP image using fastboot commands on a computer.
Once installed, TWRP allows booting into its custom recovery environment separate from the normal Android OS. TWRP is considered the most widespread custom recovery, likely due to its user-friendly touch interface compared to older recoveries like ClockworkMod.
A custom recovery is useful if you are looking forward to modifying the system on your Android device. A number of things are possible with a TWRP (TeamWin Recovery Project) custom recovery. For instance, you can gain root access, flash a custom ROM, apply custom MODS like a sound mod, or even replace or update system files to bring them into your benefit.
However, setting up a TWRP recovery on your Android phone requires a couple of Fastboot commands and the compatible TWRP recovery file as well. You can get the file from the official TeamWin website. Once you possess the recovery file and setup ADB and Fastboot environment on your PC, you can flash it in no time. Some devices lack the official support from TeamWin. Follow the instructions carefully.
Warning: Once you root or install a custom Recovery, your warranty may be void. We won’t be liable for any damage to your Android device. We won’t be held responsible if you brick your device. Reader’s discretion is advised.
Prerequisites
1. Verify your device for compatibility. Get the latest TWRP build for your device from our TWRP download page. or TWRP website.
2. Enable OEM Unlocking and USB Debugging on your device. To do so, go to Settings > About Phone > Tap on the Software Build Number several times until you get a new Developer Options in the Settings. Open Developer Options and enable USB Debugging from there. Trust the connection by allowing it when you connect it to your PC for the first time.
3. Make sure you have latest device drivers setup on your PC for a better connection. Get it from the official page of your device manufacturer.
4. To be sure, fully charge your device as the process make take a while.
5. Setup ADB and Fastboot on your Android device.
6. Most devices require unlocked bootloader in order to flash the TWRP firmware. Now different devices have a different bootloader unlock method.
Method 1: Install TWRP Recovery on Your Android Device Using Fasboot
Step 1: Download the TWRP image file from above. You don’t need to extract the file. Just transfer the file to your PC where you can easily locate it.
Step 2: Make sure you setup ADB and Fastboot on your PC. Trust the connection — check Yes on “Always allow from this computer” when you plug in the device for the first time.
Step 3: Now turn off your Android device completely and unplug it from your PC.
Step 4: Boot into the bootloader or Fastboot mode. To do so, turn off your device and then press and hold volume down + the power button simultaneously for a few seconds. When you see the bootloader screen, connect your device to the PC using a USB cable.(Choose Fastboot if option is available) For an alternative method, look at the end of this method.
Step 5: Navigate to the location where you have placed the TWRP image file. Rename the recovery file to a simple one, like recovery.img. While the folder with recovery.img file is open, launch command prompt or terminal. To do so, hold the shift key on the keyboard and right-click on an empty space and select “Open command window here” option to launch a cmd window.
Step 6: Now issue the following command in the command prompt to check your device connectivity
fastboot devices
Step 7: For newer devices like Pixel 8 Pro, Pixel 7 Pro, Pixel 6, etc.
Open a Command Prompt on your computer and type the following command to Unlock Bootloader and press enter.
fastboot flashing unlock
- You should see a request for confirmation on your phone, use the volume keys to scroll and the power key to select.
- Allow the process to complete and then type in the Command Prompt and press enter.
fastboot reboot
Step 8: Now flash the recovery image. Issue the following command for that.
fastboot flash recovery recovery.img
Step 9: Wait until the recovery gets installed.
Once the operation completes, you can now enjoy your new TWRP recovery. Alternatively, while, on Linux or Mac OS, you can issue “./fastboot flash recovery recovery.img” command to flash the file.
You can boot into the TWRP recovery you just installed by issuing the following command:
adb reboot recovery
How to boot into bootloader or Fastboot mode using ADB
In order to boot into the bootloader while connected to the PC, you can also issue the following command through your cmd or terminal. First setup ADB and Fastboot environment on your PC from requirements and then follow instructions till step.
Once into the command prompt or terminal, issue the following command:
adb reboot bootloader
You can also type in the Command Prompt and press enter.
fastboot reboot
Method 2: Install TWRP Recovery on Your Android Device with TWRP Manager or Flashify
This is an alternative method to install a TWRP Recovery. However, not all devices are supported with this method. Mostly the officially supported recoveries be flashed using the TWRP Manager App. Plus, you need to grant root access to the App in order to work. You can get the app from Play Store. All you need to do is install the App, grant root access, and search your device for support from within the app.
Get TWRP Manager from Play Store
Flashify is another good recovery flashing tool. Use it to flash the recovery image without connecting your Android device to PC using this app. Just open it and select the TWRP recovery file from within the app.
Congratulations, you now have a custom Recovery installed on your device. You can now tinker with your device and install any compatible custom ROM.


