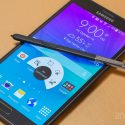
Good news comes to Verizon Samsung Galaxy Note 4 users as the bootloader unlock procedure is now available for the device. This means that you can now setup a custom recovery like TWRP and eventually flash a custom ROM you wish for like stock based custom ROMS, CM 12, or flash CM 13 based ROMs and get your device to Android 6.0.1 Marshmallow with lots of features and functionality. Courtesy of XDA forum member rRyan, an exploit is available for the Galaxy Note 4 SM-N910V for the Verizon carrier. The exploit happened while testing on other devices and has now been compiled for the Note 4. Now this is a workaround for the Verizon device and needs to flash scripts and issue ADB and Fastboot commands via terminal or command prompt. However, the procedure has been tested working by some of the Note 4 users and they have found a permanent root and installed TWRP as well on Verizon Note 4 running on Android 5.1.1 Lollipop.
Summary: First you need to download all the necessary files from the download section below. Download and install Kingroot 4.8.5 first to gain a temporary root access. Download Root Checker from play store and verify your root. Install ADB minimal onto a Windows, Linux or Mac machine. Install drivers for Note 4. Enter the commands listed in the tutorial. Wait for the phone to reboot. Shut down and battery pull. Re-run the each command in the OP and WAIT for the phone to restart. Pull battery and SDCARD. Download and Flash TWRP 2.8.5 via Odin (put the file in the AP slot) [https://dl.twrp.me/trltevzw/] Then download and Flash SuperSU from TWRP (reboot phone and enter recovery mode. hold power, vol up and home) You may also use CF Auto Root. Also, keep a copy of the latest stock firmware available for your device just in case anything goes wrong. Download Odin as well.
Disclaimer: YOU MUST DISABLE REACTIVATION LOCK OR YOU WILL HAVE ISSUES. You can download the eMMC brick bug check app on the Play Store to verify your CID starts with 15. If it does, you are good. If not, it will not work. Temporary root is required. Use Kingroot for that. We won’t be responsible for anything you do with this. You NEED a MicroSD, and it WILL be formatted during this process. Hence backup.
Download Bootloader Unlock & Root Files for Note 4
Before you proceed to the download section, you can either download the firmware directly from Samsung with a new tool without any speed restrictions or subscription from the first link or get it from third party websites.
- Tool to Download Any Samsung Galaxy Stock Firmware
→ Download | Faster download method - samsung_unlock_n4-2 script → Download | Mirror
- Kingroot 4.8.5 [Temp Root]
- Root Checker from Play Store
- Download TWRP for Verizon Note 4 [Use .tar file]
- Download Latest SuperSU v46 for Lollipop or CF-Auto Root
- Odin Software
→ Download [Mirror] | File: Odin3_v3.10.7_3.zip - Samsung Galaxy Drivers
→ Download | File: SAMSUNG_USB_Driver_for_Mobile_Phones.zip (15.3MB)
How to Unlock Bootloader on Verizon Galaxy Note 4 and Root [Install TWRP]
Before you proceed, gain temporary root using KingRoot listed in download section and the proceed with this tutorial. Also verify that you have root access using Root checker app. Also, you can download the eMMC brick bug check app on the Play Store to verify your CID starts with 15. If it does, you are good to go.
Prerequisites
1. Enable USB Debugging on your device. To do so, go to Settings>About Phone> Tap on the Build Number several times until you get a new Developer Options in theSettings. Open Developer Options and enable USB Debugging from there. Trust the connection by allowing it when you connect it to your PC for the first time.
2. For ADB and Fastboot download the quick ADB and Fastboot Installer from here for Windows users and easily setup ADB and Fastboot on Mac OS, Linux or Chrome OS from here. You may also like Universal ADB drivers, Naked ADB drivers.
3. Make sure you have latest device drivers setup on your PC for a better connection. Get it from the official page of your device manufacturer.
Installation Instructions
Step 1: Make sure you setup ADB and Fastboot on your PC. Trust the connection- check Yes on “Always allow from this computer” when you plug in the device into PC for the first time.
Step 2: Now connect your Android device to the PC.
Step 3: If you have installed the quick ADB installer, then go to the location where you have placed the samsung_unlock_n4-2 script and launch a command prompt or terminal window there. To do so, just click the address bar and type cmd and press Enter key or hold the shift key on the keyboard and right-click on an empty space and select “Open command window here” option to launch a cmd window. [If you use the minimal ADB package, then navigate to the location where you have setup ADB and Fastboot and launch a command prompt or terminal window there and place the script there as well.]
Step 4: It is time to copy the unlock file to your phone. After you have downloaded the script from the download section (samsung_unlock_n4-2) you need to copy it to the device. Make sure your current directory is the directory that the file you downloaded is in the terminal. Now it is time to push the file to the system, issue the following commands:
adb push samsung_unlock_n4-2 /data/local/tmp/
Step 5: Now open ADB shell. Issue the command:
adb shell
Step 4: You are now in a shell through ADB on your phone. Elevate your permissions by entering:
su
Step 4: You may get a confirmation on your phone for requesting root access. Be sure to grant ADB permission. Now change Directory. Go to the directory we copied our files to by entering:
cd /data/local/tmp/
Step 6: Next, CHMOD, and CHOWN the unlock file. This allows us to actually execute the file. Execute the below commands:
chmod 777 samsung_unlock_n4-2
chown root.root samsung_unlock_n4-2
Step 7: Next-Time to execute. Running the below command will generate a warning and a requirement to enter yes or no. Read the warning carefully before continuing:
./samsung_unlock_n4-2
Step 8: At this point you will see a few thing similar to this:
[+] CID at boot time is/was: 1501xxxxxxxxxxxxxxxxxxxxxxxxx
[+] device not yet dev CID, now changing to dev CID
[+] programming new CID 150100523231384d4100657e54fc1200
[+] success! powering off device, power back on and verify CID
[+] then run this binary again to finish the process
Step 9: As binary states, your phone CID is changing and is going into reboot. Before turning your phone back on, be sure that the SD card you are using will be formatted and is inserted into the phone. Once your phone reboots back online, launch terminal, ADB shell, obtain root access and change directories. You may also need to go through the procedure again. Now launch the unlock binary again:
./samsung_unlock_n4-2
Step 10: You will see the same warning and you will need to enter yes or no again. Once you enter yes, you should see something like this.
[+] CID at boot time is/was: 150100523231384d4100657e54fc1200
[+] dev CID matching, proceding to unlock
[+] backing up loaders, this will take a few minutes
[+] loaders successfully backed up
[+] success! powering off device, hopefully its not bricked!
Step 11: Keep the SD card in a safe place. If for some reason you ever brick your phone, you can possibly use the loaders on this card to fix it. Power your phone up in download mode (VOL-DOWN + HOME + POWER). Your phone should now show Developer mode. If this is not the case, you either did something wrong or your phone is not a Verizon Note 4.
Step 12: Flash TWRP 2.8.5 via Odin (put file in the AP slot) To know more go to this tutorial. Once setup, take a full Nandroid backup.
Step 13: Flash SuperSU using TWRP (reboot phone and enter recovery mode. hold power, vol up and home) Tap Install and flash.
That’s it. Like and share us on social media. If you need any help with your device, then comment down below or leave a message in the forums.
Source: XDA


![Download BGMI 3.1.0 APK + OBB [Battlegrounds Mobile India 3.1]](https://www.androidsage.com/wp-content/uploads/2022/07/Battlegrounds-Mobile-India-2.1.0-APK-Download-BGMI-2.1-APK-and-OBB.jpg)


![Download GCAM 8.4 APK For All Samsung Galaxy Devices [Exynos and Snapdragon]](https://www.androidsage.com/wp-content/uploads/2022/04/GCAM-8.4-APK-Download-For-Samsung-Galaxy-Devices-Exynos-and-Snapdragon.jpg)


![Nothing OS 2.5.5 OTA for Phone 2a rolling out with updated camera and April 2024 Patch [Download] 6 Nothing OS 2.5.5 OTA for Phone 2a rolling out with updated camera and April 2024 Patch [Download]](https://www.androidsage.com/wp-content/uploads/2024/04/Downlaod-Nothing-OS-2.5.5-rolling-out-for-Phone-2a.jpg)


Leave a Reply